Monthly Archives: March 2017

How to use Integrate third party payment gatway using xpayment?

Scenario -1

You have a payment gateway, that needs to send some datas (like total amount, API key etc) to their server and payment gateway will do all necessary things on their server and return back to your store once processing is done with payment data.

How to implement?

  1. Since it needs to redirect to payment gateway with some datas. So first select Integration type is “Redirect/Forward to Payment URL”
  2. Now enter the payment gateway URL where it need to be redirected/forwarded.
  3. Now you will have to enter all data as JSON format into Data(s) section. You can use few placeholders like {orderTotal}, {currency} etc that xpayment will handle accordingly. Xpayment also has a special placeholder {returnURL} that basically a special URL so that you can return to store from payment gateway. Most of the payment gateway, it need to supply return URL into data section OR it can be set on payment gateway control panel. Return URL denotes basically http://YOUR_DOMAIN/index.php?route=extension/payment/xpayment/confirm
  4. Now select return method type that means how your payment gateway will reply back to store. It could be GET or POST or JOSN. Normally it can be found in payment gateway manual.
  5. Finally, you will have to enter a payment successful condition. That means after returning back from Payment gateway to your store, it can be successful or failure transaction. Normally, it can be found in payment gateway manual. Most of the cases, they send some data like success==true or something like that where success is variable name that will available in their response.
  6. Now xpayment will do remaining things what to do. Either it will reject or accept depending on the data.

Scenario -2

You have a payment gateway, that needs to call their provided API URL/endpoint from your store without leaving your store. it may need to provide some data while calling that API URL.

How to implement?

1. Since it needs to call API with some datas. So first select Integration type is “API Call”
2. Now enter the payment gateway API URL that need to be called.
3. Now you will have to enter all data as JSON format into Data(s) section.
4. Now select API response type. It could be GET or POST or JOSN.
5. Finally, you will have to enter a payment successful condition.

Actually it needs some developing knowledge to integrate payment gateway.

Postal Rules in xshippingpro

Xshippingpro supports following postal rules.

Rule 1:  Numeric Postal Range

The range should be defined by a single hyphen (-). For example, 100-200 denotes postal codes 100 to 200. If you need multiple ranges, just separated them by comma(,). For example, 100-200,300-400.

Rule 2:  Prefix-Range  (Prefix hyphen range)

The prefix can be anything. The range should be like Rule 1 which means numerical postal range. Example: KW-10-15 represents KW10,  KW11, KW12, KW13, KW14, and KW15

 Rule 3:  Prefix-Range-Suffix  (Prefix hyphen Range hyphen suffix)

Prefix and suffix can be anything. The range should be like Rule 1 which means numerical postal range. Example: KW-10-15-EE denotes KW10EE,  KW11EE, KW12EE, KW13EE, KW14EE, and KW15EE

Rule 4: Postal codes separated by a comma(,).  For example, 1000, AE1111 etc.

Rule 5: Any valid regular expression encapsulated by forward slash i.e.  / For example: /AB[0-9]{2}/

Finally, you can use any wild cards in the prefix, suffix and single postal code.

For example, PA2* denotes any postal code starting by PA2.

KW-1-5-* denotes KW122, KW2XX, KW5XY and so on.

Several rules can be mixed together separated by a comma. For example: 1200, AE-1-5-*,PA2*

Grouping in x-shipping Pro

In Xshippingpro, you can divide all shipping methods up to ten group. Why do you need grouping?  It can be used following cases:

  1. You can hide/filter out unwanted shipping method at certain scenario. For example, You have two shipping methods a. Free Shipping when order total is greater than $100 and b. Flat Shipping $20. So whenever a customer purchase products worth more than $100, it will show two shipping methods during checkout which are Free Shipping and Flat Shipping. Since it is bit awkward having free shipping and flat shipping at a same time. So you can hide Flat shipping whenever Free shipping activates. we can hide it using group feature.
  2. Merge or combine shipping cost of several shipping methods into one. For example, You want to charge $5 per product for category A and $7 per product for category B. So you have created two shipping methods. One for category A and another for Category B. Whenever customer purchase products from category A and Category B together, you want to sum up the cost. Group option can do that.

It support following group type or mode:

  1. Lowest   –  It will show the method which have lowest cost among the group methods
  2. Highest  –   It will show the method which have highest cost among the group methods
  3. Average –   It will average the cost of the group methods.
  4. Sum –   It will sum up the cost of the group methods.

For defining several method as a group, first you will have to navigate in Xshippingpro -> Global setting -> Group Option

Now select Group type from available ten groups.  You can also enter a group name. This group name would appear instead of Method name if that group become activated during checkout. This group name can be combined with original method name and its price as well. For placing list of method names, please put @ and for list of prices # is needed to be placed.

Now you will have to assign your group number to the methods that you need to be linked together under general setting of each method.

Group creation is done!

Finally, it is also possible to make group from the Groups! This is called Group in groups. This group will determine based on Sort Order value defined on general tab of the each method. Shipping method having same sort order value will be placed into same group. Group of groups also can be Lowest, Highest, Average and Sum.

To know more details about top level grouping (Group of methods) and Second level grouping (Group of Groups), please check this

How to install xshippingpro in OC 2.x/3.x?

Although I am giving screenshots of xshippingpro, these steps apply to any module. So any module can be installed by following these steps.

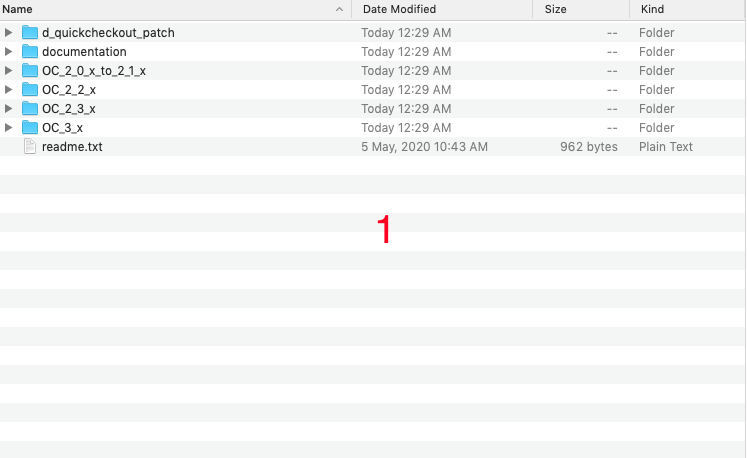
  1. First, unzip the downloaded zip file e.g. xshippingpro.zip. Once you extracted, you will find several folders for different OC versions.

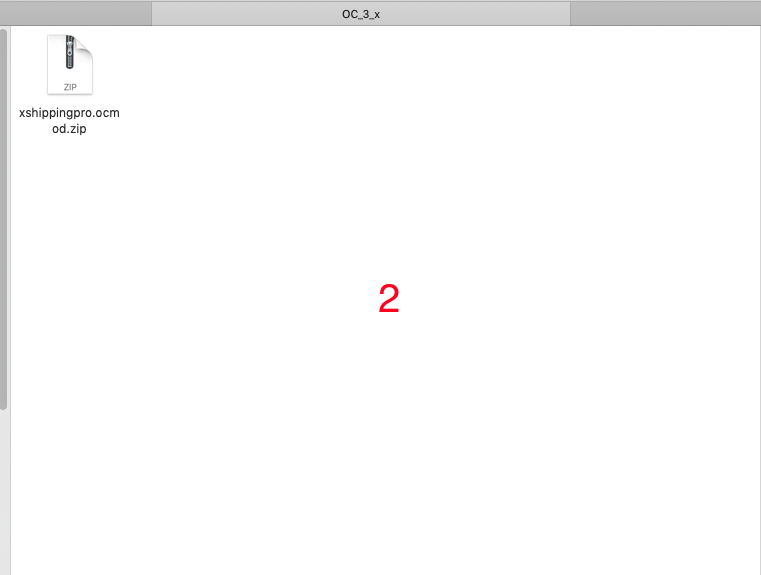
2. Now collect the installable file from the respective directory for your OC version. For example, if your OC version is 3.x, get the installable file from OC_3_x. The installable file name is xshippingpro.ocmod.zip

3. Now, please Go to Admin -> Extensions -> Extension Installer. Then select “xshippingpro.ocmod.zip” to install it.

4. Now please navigate to Admin -> Extensions -> Shipping. Now click the Install button of the X-shipping pro.

5. Finally, go to Admin -> Extensions -> Modifications and now click the “Refresh” button